After today's presentation, I have decided to just stick with the one transformation scene of the sky, however if I have time (and the coding ability) I will take two different approaches to the same scene, stormy night (lightning etc) and sunny day (birds etc). Sounds and visuals can be explored to a great extent here, and will have to be if I am to make the transformation effective and 'stand out' amoung the rest. The visuals have a good chance to be quite interesting and the interaction with those visuals could effetcively highlight this.
After looking up array's in the Reference. I'm thinking these could be very helpful in the manipulation of clouds in the day scene and the manipulation of lightning in the night scene. Fingers crossed I can achieve both scenes, with a high visual standard.

Thursday 31 March 2011
Project Two - Transformation
 This project will be focusing on interaction with visuals and the creation of sound. I have been browsing many sketches on openprocessing to give some ideas on where to start. I am keen to go back to my initial brainstorm for wallpaper one and work on some key words from that, such as natural, organic, flowing. In taking these key words I am looking at the visualisation of a natural situation, for this reason I will be taking inspiration from nature, using shapes to create scenes such as the sky, green grass, the sea etc.
Depending on my coding skills I may not end up creating all of these different scenes. But so far I have been thinking about creating the sky scene with clouds (built up with different sized circles of alternate transparencies). The interaction will then come from the action of clearing the cloud away. A code I found on OpenProcessing explores the relation of the mouse to the circle and the radius changing according to the distance the mouse is away from the centre of the circle. See below :)
Click Here for link to the code that explores the above concept.
Monday 21 March 2011
Reflection and Goals for next time.
Project one went well as I was able to manipulate a code to the extent where it become my own.
What really helped me in this project was experimenting and changing values to identify what their function was. By changing the code then visualising the result in the sketch I was able to learn about code. After todays lecture this was determined again for me when I saw that I used the right hand side of my brain. The visualisation showed that some people can see the woman turning both ways, I could only see the figure turning clockwise, meaning that I am primarily visual and need picture to learn about code.
Goals for next time...
- After the guest lecture I thought it might be beneficial to start from scratch. To begin with somehting simple and build on it, could be very helpful for me to work on with the second project on Transformation.
Final Wallpaper Four
This Wallpaper explores triangles drawn at random in a certain area within the canvas (1x2). Again using an image to determine the colour used to fill the shape and where the colours are situated on the wallpaper. Below is the image I used for the wallpaper.

Below is my final code:
import processing.pdf.*;
PImage img;
float cameraX,cameraY;
void setup(){
size(500,1000,P2D);
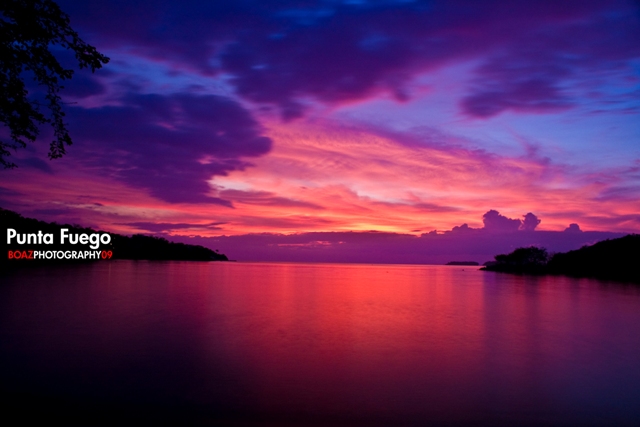
img = loadImage("http://fc01.deviantart.net/fs42/f/2009/165/5/f/Purple_Pink_Sunset_by_boaz_rbg.jpg");
beginRecord(PDF, "wallpaper_4.pdf");
background(0);
}
void draw (){
camera(-100, 50, random(-500,800), width, height, 1, 1, 1, 1);
println(cos(cameraX));
int x=floor(random(0,img.width));
int y= floor(random(0,img.height));
color myColor = img.get(x,y);
stroke(0,5); //Decided to include a thin outline to the triangles to define them and reference the shape used.
fill(myColor,10); //Transparency is 10 in order to build up the picture over time and blend the triangles, creating a soft look.
triangle(x,y,x,random(50,950),random(-200,0),random(50,950)); //Triangles have been told to be drawn within the middle section of the sketch.
}
void keyPressed(){
endRecord();
}

Below is my final code:
import processing.pdf.*;
PImage img;
float cameraX,cameraY;
void setup(){
size(500,1000,P2D);
img = loadImage("http://fc01.deviantart.net/fs42/f/2009/165/5/f/Purple_Pink_Sunset_by_boaz_rbg.jpg");
beginRecord(PDF, "wallpaper_4.pdf");
background(0);
}
void draw (){
camera(-100, 50, random(-500,800), width, height, 1, 1, 1, 1);
println(cos(cameraX));
int x=floor(random(0,img.width));
int y= floor(random(0,img.height));
color myColor = img.get(x,y);
stroke(0,5); //Decided to include a thin outline to the triangles to define them and reference the shape used.
fill(myColor,10); //Transparency is 10 in order to build up the picture over time and blend the triangles, creating a soft look.
triangle(x,y,x,random(50,950),random(-200,0),random(50,950)); //Triangles have been told to be drawn within the middle section of the sketch.
}
void keyPressed(){
endRecord();
}
Final Wallpaper:

Final Wallpaper Three
Here I have used rectangles to explore an image and the colour within that image (below).
 Again the wallpaper has only taken a section of the image to draw from resulting in the distribution of colours being different to the original image itself.
The code below is again similar to the previous codes, but with the change in image and shapes being drawn, the result is rather unique.
import processing.pdf.*;
PImage img;
float cameraX,cameraY;
void setup(){
size(500,1000,P2D);
img = loadImage("http://www.testq.com/nfs/testq/photos/0000/6021/landscape.jpg"); //Different Image
beginRecord(PDF, "wallpaper_1.pdf");
background(0);
}
void draw (){
camera(-100, 50, random(-500,800), width, height, 1, 1, 1, 1);
println(cos(cameraX));
int x=floor(random(0,img.width));
int y= floor(random(0,img.height));
color myColor = img.get(x,y);
noStroke(); //No outline for a smoother transition between colours.
fill(myColor,50); //Transparency of 50 to create a clearly defined rectangle, however still allowing for build up.
rect(x,y,random(10,450),random(10,80)); //Rectangle shape being drawn to the values of the image and within a certain dimension so as to make sure there are no huge rectangle being drawn and keeping with a largely horizontal sketched view.
}
void keyPressed(){
endRecord();
}
Here is the final result:

Final Wallpaper Two
This wallpaper explores quads that look to be lines. With an image (below) that explores orange and yellow tones of colour, with hints of the red to reference the previous wallpaper.

Below is my final code for this wallpaper (noted are the changes made to the code from previous wallpaper):
import processing.pdf.*;
PImage img;
float cameraX,cameraY;
void setup(){
size(500,1000,P2D);
img = loadImage("http://999images.com/wallpapers/orange-leaf-dew-drops-1366x768.jpg"); //Different image being imported.
beginRecord(PDF, "wallpaper_2.pdf");
background(0);
}
void draw (){
camera(-100, 50, random(-500,800), width, height, 1, 1, 1, 1);
println(cos(cameraX));
int x=floor(random(0,img.width));
int y= floor(random(0,img.height));
color myColor = img.get(x,y);
noStroke(); //No outline because I wanted the quads to appear like rays and explore line in a softer way.
fill(myColor,10); //I've made the transparency 10, in order to build up the sketch in the corner and fade it out to the edges.
quad(y,x,random(10,20),random(20,30),random(10,20),random(20,30),random(10,20),random(20,30)); //Quad has been made to be drawn at random but in very restricted dimensions.
smooth();
}
void keyPressed(){
endRecord();
}
The result is as seen below:

Final Wallpaper One
With this wallpaper I explored the ellipse shape and imported the image of a rose below in order to get a nice distribution of red and black across the image.

What is important to note is that the code is only reading part of the image, because of the 1 by 2 size I have set my code to animate in.
Here is the Final Code in dark blue. My notes are in red.
import processing.pdf.*; // Saving as PDF command
PImage img;
float cameraX,cameraY;
void setup(){
size(500,1000,P2D); //Here is the size of the canvas, and the dimension of the sketch: 2D
img = loadImage("http://images.psxextreme.com/wallpapers/ps3/red_rose_01.jpg"); //This is where the URL of the Image I have decided to use is imported.
beginRecord(PDF, "wallpaper_1.pdf"); // Saving as PDF command
background(0);
}
void draw (){
camera(-100, 50, random(-500,800), width, height, 1, 1, 1, 1); //Camera had a lot more of an effect in the P3D images.
println(cos(cameraX));
int x=floor(random(0,img.width));
int y= floor(random(0,img.height));
color myColor = img.get(x,y); //Gets the colour form the image imported.
stroke(0,5); //Here I have decided to use a stroke around the object, to ever so slightly define the shape being used.
fill(myColor,random(1,20)); //The random colour sample from imported image.
ellipse(x,y,random(0,400),random(0,40)); //The ellipses being drawn from the image width and height and at random across the canvas dimensions.
smooth();
}
void keyPressed(){
endRecord();// Saving as PDF command
}
Below is the final Image from this code (after a certain amount of animation and stopped when the image had built up to the standard I was happy with)...

Sunday 20 March 2011
Experiment. Experiment. Experiment.
After exploring the code using camera's and 'image import' some more, I have realised that I am able to create images that are very different form one another by simply changing the shape in the draw loop, and by changing the image which the code gets the colour information from. This results in a set of four wallpapers that look as one (as in a series that explore the same theme) yet also differ from one another enough so that the each wallpaper is interesting in its own way.
I have decided to use colour, because the black and white wallpapers have no where near the amount of visual interest as the colour ones. I also found that the black background compliments and frames the coloured shapes much more successfully than the white background.
Shapes and more shapes. With each shape (ellipse, quad, rectangle, triangle) I was able to manipulate the sketch in different ways in order to get it to build up an image that explores space in a new and exciting way. I found that the 'import image' function held more information than I initially realised, as it explores the arrangement of colour in the image being imported and replicates that arrangement (to a certain extent) in the wallpaper. I used this to my advantage, by creating wallpapers that relied on the image for the arrangement of space (and colour).
In my skecthes I used the shape's coordinates to my advantage by manipulating how the shape was drawn on the wallpaper, looking at concentrated areas and blank space. This means that my series has explored many aspects of the code, but has produced images that are unique from one another.
Can't save PDF in P3D sketches!!!!
Unfortunately it has proven rather impossible to create a high resolution PDF from the P3D sketch function that I have been using. This means I will have to use P2D instead of P3D, which will result in images that do not have the depth and complexity as before. However, the P2D images still manage to explore my concept very well. After Loads of experimentation I have begun to shape my four wallpapers into a series that all explore line weight, depth, contrast and space arrangement.
Thursday 17 March 2011
Sketches and Concepts from first presentation


The sketches below are my representations of my concept and theme: Contrast, Space Arrangement, Line weight.


While I like the direction I am heading I feel like I want more complexity to some of my sketches yet still show simplicity.
My concept is based around the first year experience (that I remember) and therefore I almost want my skecthes to take on a journey of their own. From left to right I want the images to show an increasing complexity and elegance. Looking at some of the rules and processes I went through when undertaking my firts year of Design Innovation.
Starting with basic line drawing and getting to know the drawing tools as one of the first "experiences" I had in the first year design studio, means that I want the first image to represent something very similar to the first sketch (see above, horizontal and vertical lines). I really like one of my previous codes that experiments with ellipses, and would like to use this as my first wall paper design but with a lighter line weight. The reason I like this image is because (with a lighter line weight) the sketch builds up to create areas of built up thicker looking line weight and creates this idea of contrast as well as creating points of interest (space arrangement).
For Example...

However after the skecthes I have just been creating with the 3D aspect and use of camera's... This image does not stand up to or along side that sketch in any way.
So a way of getting around that is to play with and produce alternatives to the code using cameras, by using different shapes and possibly looking at either overlaying this pattern to the other code. Or else take a different perspective and use line (in the place of shapes) to attempt the same sort of reaction.
Changing and understanding code
After Tuesdays tutorial I realised that although I understood parts of the code I still didn't know how the camera function worked at all, or how I could change the code to only animate for a certain length of time. After being taught about for() loops and discussing with Luke my options, I soon gathered that I could make the code animate for a certain amount of frames before stopping, by using a for() loop. Exciting!
In addition, after Fridays tutorial I found that I could take a snap shot of the animation and save this as a PDF. However I still plan to use for loops as they allow me to alter the image in ways I hadn't expected.
In addition, after Fridays tutorial I found that I could take a snap shot of the animation and save this as a PDF. However I still plan to use for loops as they allow me to alter the image in ways I hadn't expected.
Saturday 12 March 2011
Experiments with code for my Wall Paper concept.
The following code is one I found on OpenProcessing. It took my interest because of the horizon point angled across the middle, which linked into my theme of arrangement of space.


PImage img; |
void setup(){ |
size(400,400,P3D); |
img = loadImage("art.jpg"); |
|
background(0); |
|
|
} |
float cameraX,cameraY; |
void draw (){ |
|
|
camera(-100, 50, random(-300,500), width, height, 1, 1, 1, 1); |
cameraX = radians(map(mouseX, 0, width, 50, 0)); |
cameraY = radians(map(mouseY, 0, height, 180, 0)); |
println(cos(cameraX)); |
|
int x=floor(random(0,img.width)); |
int y= floor(random(0,img.height)); |
|
color myColor = img.get(x,y); |
|
stroke(0); |
fill(myColor,100); |
rect(x,y,random(20,200),50); |
} |
Which looked like this...

I made some changes to the code to remove the black lines around the shapes. Also changing the rectangle to an ellipse. and importing different images from the net to get the colour transition I wanted.
PImage img;
void setup(){
size(375,750,P3D);
img = loadImage("IMAGE>FROM>NET");
background(0);
}
float cameraX,cameraY;
void draw (){
camera(-100, 50, random(-500,800), width, height, 1, 1, 1, 1);
cameraX = radians(map(mouseX, 0, width, 50, 0));
cameraY = radians(map(mouseY, 0, height, 180, 0));
println(cos(cameraX));
int x=floor(random(0,img.width));
int y= floor(random(0,img.height));
color myColor = img.get(x,y);
noStroke();
fill(myColor,50);
ellipse(x,y,random(10,500),80);
The following were some of the results..
The following was a black and white image. As I am still tossing up between using colour or not. My concept does not call for colour and could work better without any.
Subscribe to:
Posts (Atom)